The first coffee houses in England opened their doors in the mid-1600s. Soon after coffee houses were popping up in Paris, where people met to drink coffee and discuss the day’s important issues.
Cafes and coffee shops have long been a way of life and with the growing population of coffee drinkers and a keen interest in making barista-style coffee at home, it was only a matter of time before Java aficionados would want a coffee bar at home. In fact, in 2021, the National Kitchen and Bath Association predicted that coffee stations would be part of newer kitchen designs.
Whether your home has a built-in coffee station in the kitchen or not, creating a coffee bar can be a fun DIY project and you don’t need a large space for this project. So grab your coffee spoons and let’s get to it!

Photo by Nathan Dumlao on Unsplash
In this small kitchen, a kitchen cart becomes a coffee station. Use the top of your coffee station to display a single-serve coffee maker or a much-coveted espresso machine, along with coffee beans or read-to-brew coffee. Next to the coffee machines, stack some favorite mugs and other coffee implements. While most people will emphasize mugs and other accouterments, we’re here to remind you about the importance of having coffee spoons at the station. And we mean right there, ready to use!
After all, this is the place where you’ll pour yourself, your family, and guests delicious freshly brewed coffee or tea. What if anyone wants to add coffee creamer, flavor shots, sugar, or even mini marshmallows to their coffee?

A Caffè Gommosa is a simple marshmallow coffee that is made of espresso shots and mini marshmallows. Photo by Alexander Raw on Unsplash
Nobody wants to go hunting for a coffee spoon in the morning or anytime, so having dedicated coffee spoons for your home coffee bar is a must. What if there isn’t a drawer available near your station, you might ask? Set them in a fun jar, small crock or canister, or even a cup to keep them neat and handy.
Now we could talk about the different types of coffee spoons, such as the demitasse spoon or after-dinner coffee spoon, but we’ll save that for another time. We’re going to concentrate on a spoon you may have overlooked. Let’s say your coffee station budget only allowed for one set of spoons and you wanted a spoon that could handle any task…well, in our opinion, this is “that” spoon.
Besides, with over 50 delicious coffee drinks like lattes, cappuccinos, espressos, mochas, Americanos, and more…you want a coffee spoon that can do it all.
Enter the sugar spoon.

Photo by Carrie Dault of Pantry To Table
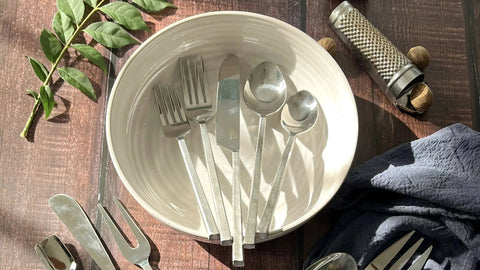
How do our sugar spoons measure up? At about 6 inches long, our sugar spoon sports a long handle that’s ideal for hot or iced drinks in tall glasses. Made of stainless steel with a polished finish, the round bowl holds about 1 ½ teaspoons of sugar.

The Sundance sugar spoon has long copper-finished handles that add an elegant rustic touch to your coffee stations. Photo by Carrie Dault of Pantry To Table
What’s more, our sugar spoons come in a set of four, a significant grouping for the tasks at hand…even if that includes some serious coffee tasting!
What’s a coffee cupper?
Chances are you’ve heard of a wine sommelier. They are trained and knowledgeable wine professionals, who work in fine restaurants. Along with the culinary team, the sommelier will suggest wines that complement particular foods on the menu.
There are also professional coffee tasters, called Q graders or coffee cuppers. To become a certified coffee cupper, one must undergo rigorous training and pass 19 tests. Employers in the coffee industry rely on these graders to test a coffee’s quality, and consistency and to evaluate its flavor profiles and consistency. These quality control professionals work for coffee roasters, green buyers, and exporters.
And just as coffee stations are becoming the standard in a coffee-lovers kitchen, coffee-tasting parties are adding a unique spin to a weekend brunch with friends.
What happens at a coffee-tasting party?
At a professional cupping session, there are usually different bean samples laid out on the table, as well as equipment to brew and taste the coffee. The beans can produced in the same country or many different countries.
For your coffee-tasting at home, keep it simple with 2-4 different types of coffee with beans grown in the same country.
At a typical cupping session, professionals go through different steps to test the aroma, and since they may test many different coffees at once, a pro coffee tasting station will usually include spittoons, so the testers won’t get a caffeine buzz.
For your coffee-tasting party, we suggest you skip the spitting step and simply swallow and enjoy the coffee.
Here are our simplified steps for coffee tasting:
- Place a bowl of coffee beans in front of your guests.
- Give each taster a cupping sheet for notes.*
- Grind the coffee into course grinds (think about the size of sea salt).
- Place 2.15 teaspoons (9 grams) of ground coffee into a taster’s cup or bowl.
- Have your guests smell the dry roasted coffee and make note of the aroma.
- Boil water in your kettle to pour over the grounds.
- Once the water has boiled, pour it gently over the grounds.
- Set a timer for 4 minutes (the length of time the coffee needs to sit before you begin breaking the crust).
- Guests now can assess the wet aroma of the coffee.
- When the 4 minutes are up, everyone begins breaking the crust. Using the rounded portion of one of the coffee spoons, the coffee grounds are pushed to the back of the bowl. At the same time, everyone should get in close and take in the aroma of the coffee. Spoons are rinsed in a glass of water after breaking the crust.
- Using two coffee cupping spoons, the remaining coffee grounds are removed from the top, along with any foam. Have a bowl or cup nearby for the grounds and foam.
- Allow the coffee to cool for a few minutes before having a second coffee taste.
- To taste the full range of flavors, have guests slurp the coffee so it can spread over the tongue. Everyone takes two tastes, slurping the coffee each time and noting the different flavors as it cools. The coffee spoons are dipped and rinsed in a glass of water between each taste.
- After the coffee is cold, everyone takes another taste, making note of the aftertaste for both the hot and cold coffee.
*Ideally, you should have one sheet per coffee. You can download a cupping sheet online or create a simple one that includes a place for notes.

The coffee taster uses two cupping spoons to remove the top grounds and foam. Photo by René Porter on Unsplash
What to include on your coffee cupping form
A coffee cupping form is to help your guests decide if this is a coffee they would enjoy drinking every day. Or is this a coffee they would prefer to drink cold?
At the top of your form, have a coffee profile, with a place to write the name, origin, roaster, and roast date of the coffee.
For aroma, have three blank spaces for dry grounds, wet grounds and filtered (after breaking the crust.)
For taste, help your guests by including a simple checklist, with fruity, floral, sour/tart, smoky, spicy, and chocolate. Don’t forget to leave a spot for notes.

Photo by Sean Benesh on Unsplash
Now that you know the basics of hosting a coffee cupping party, here’s a quick checklist of what you’ll need:
- Coffees (2-4 different coffees)
- Small cupping bowls for tasting coffee (should hold 5-7 ounces)
- Coffee bean grinder
- Kettle
- Timer
- Rinsing glasses filled with hot water
- Cupping spoons (Note: special cupping coffee spoons are available, but the deep bowl and rounded bottom of our sugar spoons make them a great choice.)
- Vessel or bowl to collect used grounds/foam
- Coffee cupping forms (one form for each coffee tasted)

Photo by Carrie Dault of Pantry to Table
Whether savoring a delicious after-dinner cappuccino from your coffee bar or gathering friends together for your first coffee-tasting party, having the right coffee spoons at hand will make the difference.
Café Photo by Michał Parzuchowski on Unsplash


